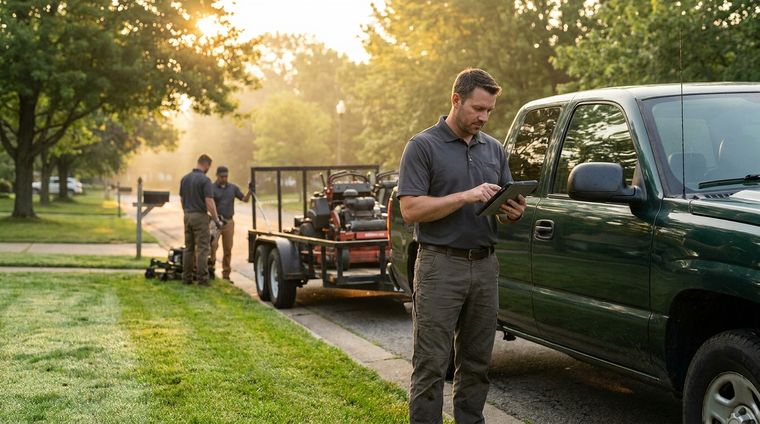
You're probably looking at a bed that seems simple on the surface. Remove the weeds, throw in some compost, plant, mulch, done. Then a few weeks later the bed stays soggy at one end, weeds push back through thin mulch, and the client starts asking why the new planting looks uneven.
That's where most garden bed preparation jobs go sideways. The failure usually starts before the first plant goes in. Poor grade, compacted soil, skipped testing, vague material quantities, and bed dimensions that force people to step where they shouldn't. The fix is rarely glamorous, but it is predictable. Careful prep gives you cleaner installs, fewer callbacks, and beds that hold up after the crew leaves.
Table of Contents
- Understanding Proper Garden Bed Preparation
- Assessing the Site and Planning Soil Amendments
- Clearing Beds and Defining Edges
- Selecting Tilling or No-Till Approaches
- Designing Irrigation and Drainage Layouts
- Implementing Mulching and Optimal Planting Timing
- Coordinating Crew Tasks Time Estimates and Client Communication
Understanding Proper Garden Bed Preparation
Good garden bed preparation starts long before planting day. It starts when you decide whether the site can drain, whether the soil can support roots, and whether the crew can build the bed without compacting it during the process.
A rushed prep job usually looks fine for a week. Then the weak points show up. Water holds where the bed wasn't graded properly. Root growth stalls where someone stepped repeatedly in the finished area. Weeds return where the old bed wasn't properly cleared or the mulch was spread too thin. None of those problems feels dramatic on install day, but they all become client problems later.
Practical rule: If the bed is hard to maintain during installation, it'll be harder to maintain after handoff.
The strongest prep work follows a simple order:
- Read the site first. Check slope, runoff, low spots, old root mass, sun, and access.
- Test and amend the soil on purpose. Don't guess on pH or nutrients if the bed matters.
- Clear and shape the bed fully. Remove persistent weeds before you loosen soil.
- Choose the right soil-building method. Some sites need subsoil loosening. Others respond better to a layered approach.
- Finish with planting support. Irrigation, drainage, and mulch should match the bed you built.
There's also a business angle. Proper preparation shortens the messy part of the install. Crews move cleaner when the bed width, paths, and sequence are planned ahead of time. You spend less time correcting grade, less money on wasted materials, and less energy explaining why a “finished” bed has to be reopened.
That's why I treat garden bed preparation as the actual construction phase, not a prelude to the primary work. Planting is the visible part. Preparation is what determines whether the planting holds.
Assessing the Site and Planning Soil Amendments
A bed can look fine on install day and still fail by midsummer because the site was read too loosely. I've seen crews spread the same compost blend on every job, then spend the next visit explaining chlorosis, runoff, or irrigation stress that was predictable from the first walk.
Start the assessment where the bed will succeed or struggle later. Stand at the high side of the area after rain or irrigation if you can. Look for where water enters, where it slows, and where it leaves. Check how the grade relates to walks, foundations, downspouts, and lawn edges. Then read the surface itself. Dense turf, old root mass, and polished, compacted soil each point to a different prep scope and a different labor number.

Before I price soil work, I want five notes on paper:
- Light pattern: Morning sun, filtered shade, or hard afternoon exposure.
- Water behavior: Ponding, sheet flow, runoff from hard surfaces, or dry zones under eaves.
- Grade and bed position: Across the slope, with the slope, or at the base where debris collects.
- Existing ground cover: Turf, perennial weeds, woody roots, or bare compacted soil.
- Access and staging: Wheelbarrow route, dump location, and whether material has to be moved by hand.
Those notes affect more than plant choice. They affect crew time, amendment volume, and whether the bed should be built for moisture retention or faster drainage. On lower-water installs, I align soil prep with the planting plan early. A bed intended for lean irrigation holds up better when soil texture, spacing, and root competition are planned together, as in this guide to drought-tolerant garden design.
Soil testing belongs in the planning phase, not after planting. The University of Connecticut's guidance on preparing new garden beds recommends testing pH and nutrients so lime and fertilizer are applied at recommended rates. The same guidance gives practical field benchmarks for compost use, including roughly one 5-gallon bucket for every 10 feet of a 30-inch-wide bed, heavier inputs for raised sections, and a bulk planning rule of about 162 square feet of coverage per cubic yard at 2 inches deep.
That gives you a way to bid the job instead of guessing. On a small residential bed, a proper site review and sample collection might add 20 to 30 minutes. On a larger front-yard rebuild with access constraints, it can add an hour and save half a day of correction later. The trade-off is simple. More time up front, fewer surprises after delivery.
Use a worksheet that ties field notes to materials and labor:
| Item | What you record |
|---|---|
| Soil condition | Compacted, workable, or friable |
| Test status | Sample taken, pending results, or amend now based on known history |
| Organic matter plan | Topdress, incorporate, or rebuild with imported material |
| Material quantity | Buckets for small beds, cubic yards for larger areas |
| Labor note | Hand carry, wheelbarrow access, or machine assist |
| Client note | pH correction pending, compost allowance included, or drainage issue excluded |
I also document bed dimensions before any material is ordered. Beds wider than a comfortable reach from one side create maintenance problems later, especially where clients expect hand weeding without stepping into the soil. In tight residential work, that ergonomic detail matters almost as much as the amendment recipe.
A short client note helps here: “Site conditions suggest soil amendment quantities may change after pH results and excavation exposure are confirmed.” That sentence prevents the common argument that compost, sulfur, or lime was “extra” when the need was visible but not measurable on day one.
A site visit without a material takeoff and a client note is still only a walk-through.
Clearing Beds and Defining Edges
A bed usually succeeds or fails before the first plant goes in. I see it on renovation jobs all the time. The crew clears the surface fast, skips the edge layout, then spends the rest of the install correcting wandering lines, buried grass, and soft spots under mulch.

Remove what will come back
Start with the bed footprint, not the whole yard. Strip out trash, loose stone, fallen branches, old plastic edging, and any root mass that will interfere with planting or grading. Then separate annual weed cleanup from perennial weed removal. That distinction matters on labor.
If bindweed, bermuda grass, nutsedge, or deep taproot weeds are present, remove them before any loosening or reshaping. Chopping and mixing those roots through the top layer usually turns one problem area into ten. On small residential beds, hand removal is slower up front and cheaper than callbacks. On larger conversions, a smothering approach can make sense, especially where the client wants less digging and can wait longer for the bed to finish cycling down.
Crew planning matters here. A straightforward cleanup pass on a small foundation bed may take one worker 30 to 45 minutes. An overgrown turf-to-bed conversion can take a two-person crew half a day before edging even starts. If the property has a lot of leaf litter, storm debris, or abandoned material, it helps to price that separately as yard cleanup for spring and fall instead of burying the time inside bed prep.
Set widths, grades, and paths before planting
Once the footprint is clean, stake the shape and cut the edge. Use a hose or marking paint for curves, string line for straight runs, and a trenching spade or flat shovel for the first cut. A crisp edge is not just visual. It sets the mulch boundary, gives the crew a fixed planting limit, and makes mowing easier after the install.
Do the layout before soil work if you want accurate quantities. Bed width affects compost volume, mulch takeoff, irrigation spacing, and labor hours. It also affects maintenance. Beds that are too wide force people to step into the soil to weed, prune, or replace plants. That traffic damages structure and creates the compacted pockets that hold water and restrict rooting.
For most hand-maintained residential beds, I keep the working width within comfortable reach from one side or provide clear access from both sides. Paths need to be obvious from day one, and the crew needs to use them. Finished grade should sit slightly above the surrounding lawn so runoff does not wash into the planting area and drown the crown of the plant.
Use a field checklist before plants arrive:
- Edge line: Confirm curves and straight runs from at least two viewing angles.
- Working width: Size the bed for reach and future maintenance, not just appearance.
- Path access: Leave room for foot traffic, hose routing, and service access.
- Finished grade: Keep the bed proud of adjacent turf where drainage is a concern.
- Estimate note: Record any added hand labor for root removal, sod stripping, or haul-off.
That checklist saves time later. On a crew install, ten minutes spent restaking a line is cheaper than an hour of resetting edging, moving shrubs, and regrading mulch.
Here's a practical demonstration of bed clearing and prep sequencing:
Accessibility belongs in this step too. Bed dimensions should fit the people who will maintain them. If a client wants easy hand weeding, narrow the reach. If they need mobility access, widen the path and note that requirement on the plan and estimate so nobody cuts it down in the field. A short client note works well: “Bed widths and access lanes are laid out for maintenance reach and site drainage. Changes after layout may affect labor and material quantities.”
Selecting Tilling or No-Till Approaches
A bed can look finished on install day and still fail in the first heat cycle because the soil profile was handled wrong. I see that more often on fast-turn jobs, where the pressure is to mix everything at once and start planting. The right choice is simpler than it sounds. Match the method to compaction, drainage, planting type, and how much disruption the site can handle.

When tilling earns its place
Tilling or broadfork loosening makes sense when roots will hit a hard layer, when the upper soil is compacted from traffic or construction, or when a client needs a bed planted on a short schedule. The commonly cited target is to loosen soil roughly 6 to 12 inches deep and work compost into the upper root zone, as described in Oregon State University Extension guidance on preparing garden soil with organic matter and tillage.
That approach fits new-build lots, compacted turf conversions, and food gardens where uniform rooting depth matters. It also carries a cost. A rear-tine tiller saves labor on open ground, but it can smear wet soil, chop existing weed roots into more pieces, and leave a powdery surface that crusts after irrigation.
On crew estimates, I usually budget machine tilling as a speed play, not a soil cure-all. Broadforking takes longer but gives better control in tight residential beds, especially near tree roots, utilities, and finished hardscape. If the bed will tie into drip irrigation installation and repair, that cleaner structure often makes trenching and emitter layout easier.
A tilling setup usually includes:
- Broadfork: Best for deep loosening with less soil inversion.
- Rear-tine tiller or rototiller: Faster on larger areas with clear access.
- Compost rake and soil rake: For even amendment distribution and finish grading.
- Flags or paint: To protect root zones, utilities, and no-go areas.
When no-till is the better call
No-till works better where the soil already has decent aggregation, where slope or runoff raises erosion risk, or where clients want less disturbance to soil life and existing structure. It also helps on established sites with fewer compaction problems and more concern about bringing buried weed seed to the surface.
The trade-off is management. Surface-applied compost and mulch improve soil over time, but they do not give you the same immediate reset that loosening does. The first season usually needs tighter weed control, closer moisture checks, and clear client expectations about settling and slower soil change.
Don't choose tilling because it feels productive. Choose it because the soil needs loosening.
A simple comparison keeps the decision honest:
| Approach | Best fit | Watch out for |
|---|---|---|
| Tilling | Compacted sites, fast-turn installs, beds needing blended amendments | Working wet soil, overmixing, surface crusting |
| No-till | Stable soil, erosion-prone areas, low-disturbance projects | Slower improvement, heavier reliance on mulch and surface compost |
Hybrid prep is often the best value. Loosen the worst zones, leave stable soil alone, and keep foot traffic out once the bed is shaped. That saves labor, protects structure where it is already working, and gives clients a method you can explain in plain terms on the estimate: “Compacted areas will be mechanically loosened. Stable areas will be improved with surface compost and mulch to limit disturbance and control labor cost.”
Designing Irrigation and Drainage Layouts
A bed can look clean on install day and still fail after the first heavy watering. I see it most often in low corners, against patios, and anywhere the soil profile was built without a clear exit path for water.
Start by tracing where water will move before you set a single emitter. On a small residential job, that can be as simple as checking grade with a laser or line level, then running water long enough to see where it ponds, sheds, or cuts channels. Mark the high side, low side, hose bib or valve location, and any hard surfaces that will throw runoff into the bed. Those notes save rework later, and they make scope conversations with clients easier because you can point to a drainage constraint instead of arguing about symptoms after planting.
A workable layout does four jobs well:
- Fits water delivery to the plant grouping. Annual color, shrubs, and edibles rarely belong on the same schedule.
- Protects the low side of the bed. That is where runoff, overspray, and saturated soil usually stack up.
- Keeps service access open. Flush caps, filters, and connections need to stay reachable after mulch and plant growth.
- Supports a realistic labor budget. Clean zoning and accessible repairs cut crew time on callbacks.
For most smaller beds, drip is the better starting point because it puts water near the root zone and leaves less margin for overspray onto walks and siding. Scope needs to be spelled out on the estimate if you also handle irrigation installation and repair for residential beds. I usually separate it into three line items: water supply connection, distribution layout, and post-install adjustment visit. Clients understand the price faster when they can see what is included, and crews waste less time sorting out gray areas on site.
Handling patios gravel and compacted bases
Beds over hard or compacted surfaces need a different build-up. Water does not move through those bases the way it does through open soil, so the soil profile has to do more of the work.
Guidance from the Massachusetts Agriculture in the Classroom Building Garden Beds on Hard Surfaces manual recommends a 2-inch pea gravel layer under fabric with 6 inches of amended soil for beds built over hard bases. Tie that detail directly to the site plan before install. If runoff has nowhere legal to go, the bed can stay saturated at the bottom and dry out at the top in the same week.
That changes how I sequence the work:
- Confirm the runoff path first. Water needs a defined place to move without dumping onto paving or neighboring areas.
- Keep the layers distinct. Fabric separates soil from the gravel base so the profile does not blend together over time.
- Use gravel as a planned drainage layer. Random pockets of stone do not fix a bad base.
- Maintain enough planting depth. Thin soil over a hard surface swings too fast between soaked and dry.
There is a trade-off here. Extra soil depth and drainage materials raise install cost, but they usually lower replacement cost and complaint time during the first season. On crew planning, these beds also take longer than they look. Measuring base depth, hauling gravel, placing fabric cleanly, and checking outlet direction can add meaningful labor even on a compact residential project.
Keep irrigation conservative at startup. Shorter run times with a return visit in a week gives you real field feedback on infiltration, ponding, and dry spots. That follow-up is worth building into the proposal up front, especially on conversions over patio slabs, compacted gravel, or old construction fill.
Implementing Mulching and Optimal Planting Timing
A bed can be graded well, planted well, and still struggle because mulch went on too thick or planting happened on the wrong day. I see that on real installs more than bad plant selection. The finish work looks simple, so crews rush it. Then the callbacks start. Buried crowns, soggy root zones, weed flare-ups, and young plants that stall for two weeks after install.
Mulch needs to be treated as a measured layer, not a cosmetic cover. As noted earlier, the target range is enough to shade soil and slow weed germination without sealing off air at the surface. In practice, that means checking depth with a tape in several spots, especially after raking. Fresh mulch piles high at the edges and low in the middle if nobody checks it.

The material matters too. Shredded bark stays put on slopes better than lighter products, but it can knit together if applied too heavily. Compost-based mulch helps where the soil still needs organic matter, but it usually breaks down faster and needs topping up sooner. Rock mulch cuts replacement labor in some dry sites, yet it reflects heat and raises stress on new plantings. There is no perfect choice. Match the mulch to the bed, the maintenance plan, and the client's tolerance for annual refresh costs.
A field sequence that holds up:
- Finish grading first: Set the final soil line before any mulch comes off the truck.
- Plant and inspect spacing: Adjust layout while root flares and crowns are still visible.
- Run irrigation briefly: Catch clogged emitters, bad spray angles, and dry pockets before the surface is covered.
- Apply mulch to a consistent depth: Check around bed centers, edges, and plant groupings instead of guessing by eye.
- Pull mulch back from stems and crowns: Leave breathing room at the base of each plant.
- Settle it with light water only if needed: Enough to keep it from blowing or shifting, not enough to compact the surface.
On crew planning, mulch is rarely the five-minute cleanup step clients think it is. Spreading and dialing in depth on a modest residential bed can take longer than planting if the material is wet, access is tight, or edging is intricate. That should be priced that way. If a proposal lumps mulch into a vague finish allowance, labor disappears fast.
Planting timing needs the same discipline. For shrub and perennial beds, the cleanest sequence is usually plant first, inspect orientation and spacing, then mulch last. In edible beds, lighter coverage around young plants works better at the start because seedlings and transplants need warmer surface soil and close monitoring. Heavy mulch too early can slow establishment and make it harder to read moisture accurately.
Use this as a jobsite rule:
| Bed type | Better timing choice |
|---|---|
| Perennial border | Plant first, mulch after final layout |
| Shrub bed | Install irrigation and plants, then mulch |
| Raised edible bed | Finish soil profile, plant, then use lighter surface coverage around young plants |
Weather still overrides the schedule on paper. If the soil is cold, greasy, or staying saturated between irrigations, hold the planting crew and finish prep instead. One lost day costs less than replacing stressed material and explaining to a client why a new bed already looks tired.
This is also where professional metrics help. Add a mulch-depth check to the punch list. Note the install date, soil condition, and forecast in the job record. If the client asks why planting shifted by a few days, a short note works better than a vague answer: Soil is still holding too much moisture for clean root establishment. We're holding planting until conditions improve so the bed performs better in the first month. That kind of communication prevents friction and protects the result.
Coordinating Crew Tasks Time Estimates and Client Communication
A good garden bed preparation job can still lose money if the handoffs are sloppy. Most margin leaks happen in transitions. One person starts clearing before layout is marked. Another spreads compost before irrigation routing is decided. Someone mulches before the client approves the edge line.
Build the job around handoffs not guesswork
Bed dimensions shift from a horticultural concern to an operational one. Black Creek Farm's guidance that bed widths of 2 to 3 feet with 2-foot pathways improve crew speed and reduce injury risk is useful because it affects movement, staging, and tool access in practice, as noted in its PDF on garden bed preparation ergonomics.
The easiest way to manage prep work is to assign clear ownership by phase:
- Layout lead: Marks bed line, paths, access points, and grade targets.
- Clearing crew: Removes weeds, debris, and unwanted surface material.
- Soil crew: Brings in compost or soil amendments and completes blending or layering.
- Irrigation tech or installer: Places lines only after bed footprint is locked.
- Finish crew: Handles edging touch-up, planting support, and mulch.
The prompt asked for time and cost estimates, but no verified numerical labor or pricing benchmarks were provided. So instead of inventing them, use a job table as a planning framework and fill it with your own tracked field data.
| Task | Time (hrs) | Crew Size | Cost ($) |
|---|---|---|---|
| Bed clearing | |||
| Soil mixing | |||
| Edging | |||
| Irrigation setup | |||
| Mulching |
That table becomes useful once it reflects your actual jobs, your soil conditions, and your crew pace. A sandy side yard, a root-filled front foundation bed, and a patio conversion won't prep at the same speed.
A client message that prevents confusion
Clients usually don't object to prep work. They object to not understanding why it takes time and materials before visible planting begins. The fix is a short, direct scope note in the proposal or kickoff email.
A clear version looks like this:
We'll begin by marking bed lines, removing persistent weeds and debris, correcting grade where needed, and preparing the soil profile before planting. This prep work protects drainage, root health, and long-term bed performance. Planting and mulch are the finish stage, not the first stage.
A change-order note can be just as plain:
After opening the bed, we found conditions that require added clearing or soil rebuilding beyond the original scope. We'll confirm the revised work before proceeding so the finished bed performs as intended.
That kind of language keeps the client focused on outcomes, not just appearances. It also protects your crew from being rushed into planting over a bed that isn't ready.
This platform helps garden professionals run this kind of work without juggling separate tools for leads, scheduling, routing, invoicing, payments, and bookkeeping. If you want one system to organize garden bed installs, maintenance follow-ups, and client communication from first quote to final invoice, take a look at Landscapey.